Capturing the Art of a Tansel Powder Horn ©
Foreword: Tansel powder horns have fascinated collectors for years with their large federal eagles, dogs chasing deer, and heroes of the day. Much of the interest comes from each Tansel horn being unique and offering something new to collectors. But most people never get to see more than a few Tansel powder horns due to their rarity. Years ago, the author decided to make the artwork on Tansel horns more available to historians and collectors by doing ink drawings of all the Tansel horns he could get access to, in addition to those where he could get owners [often auction houses and museums] to provide good photos. So far, about 115 Tansel powder horns have been documented in ink sketches. Some sketches have appeared in prior magazine articles on the Tansel family and their horns, and all sketches will eventually be available in a reference book on the Tansel powder horn carvers and their powder horns. In the meantime, readers may enjoy seeing how a Tansel powder horn ink sketch takes form, from beginning to end.
Author’s Horn Sketches: This short article will not burden readers with all the steps in preparation, preliminary pencil sketching, and final inking needed to produce a Tansel powder horn sketch. Anyone interested in more details can find them in the author’s article, “The Art and Craft of Sketching Powder Horns,” published in The Honourable Company of Horners’ book, The Hartley Horn Drawings, A Collection of Powder Horn Drawings by Robert M. Hartley [2010], with copies available on Ebay. This overview simply shows the daily progress of sketching an Indiana Tansel powder horn from start to finish. Each image was made at the end of a work session. Session times varied, depending on how long the author could work before his eyes get blurry or his fingers stiff, at which time he stopped rather than risk mistakes… especially when doing the final inking. The pictures begin with the first day’s pencil sketching and end with the last day’s finished ink sketch. Note: color variations [gray vs. beige] in paper are due to both incandescent and fluorescent light sources being used when drawings were photographed.

Session #1: After the first drawing session, light working lines have been laid out [very light and hard to see], and a decision made on where to locate the eagle to prevent the horn’s second major figure, a standing lady, from running off the top or bottom of the paper. The main figure, the federal eagle, was then sketched in pencil. Both placement and orientation of the eagle were important to achieve a balanced and realistic appearing final ink drawing.

Session 2: The horn’s second major figure, a standing lady, was added in this session, along with two secondary figures of a dog and deer. A pencil sketch always starts with the eagle, followed by the figures closest to the eagle and working outward as figures are added. A faint line marks the edge of the carved area to the right of the deer, needed to locate and scale figures correctly. It is the first step in outlining the outer edges of the horn’s body around the artwork.

Session 3: Two deer and a partial dog figure [below lady] were added in this session. Faint lines now mark the right and bottom edges of the horn’s carved surface. Nonstandard figures often take longer to draw than repetitive Tansel figures. On this horn, the lady and the deer with turned head and stiff front legs were nonstandard figures, requiring more time to sketch to ensure they matched the horn’s figures.

Session 4: This was a long session with all remaining carved figures penciled into place, including the scalloped basal border. After the figures were in place, an outline of the horn’s skin, or decorated area, was finalized around the figures. The last items sketched were the powder horn’s spout and butt plug, since they could not be properly located until the final outline of horn body was completed.

Session 5: The inking process started in this session, with the outer edges of the horn’s skin inked first. Figures then began to be inked, started at the bottom and then the side of the drawing. Inking is always done from the outer edges working inward to prevent smudging the remaining penciled-in figures. Fine shading lines [eagle’s feathers, border scallops, etc.] are not added until the figure is inked; shading is then done free hand while inking the figure.

Session 6: The eagle is the most complex figure on a Tansel powder horn, with its many small details including shading/veining feathers, stars, and banners. Therefore, the eagle takes more time than other figures to ink. In this session, only the eagle and a nearby deer were inked due to the time involved, making the session one of the longer ones in the horn’s sketching/inking process.
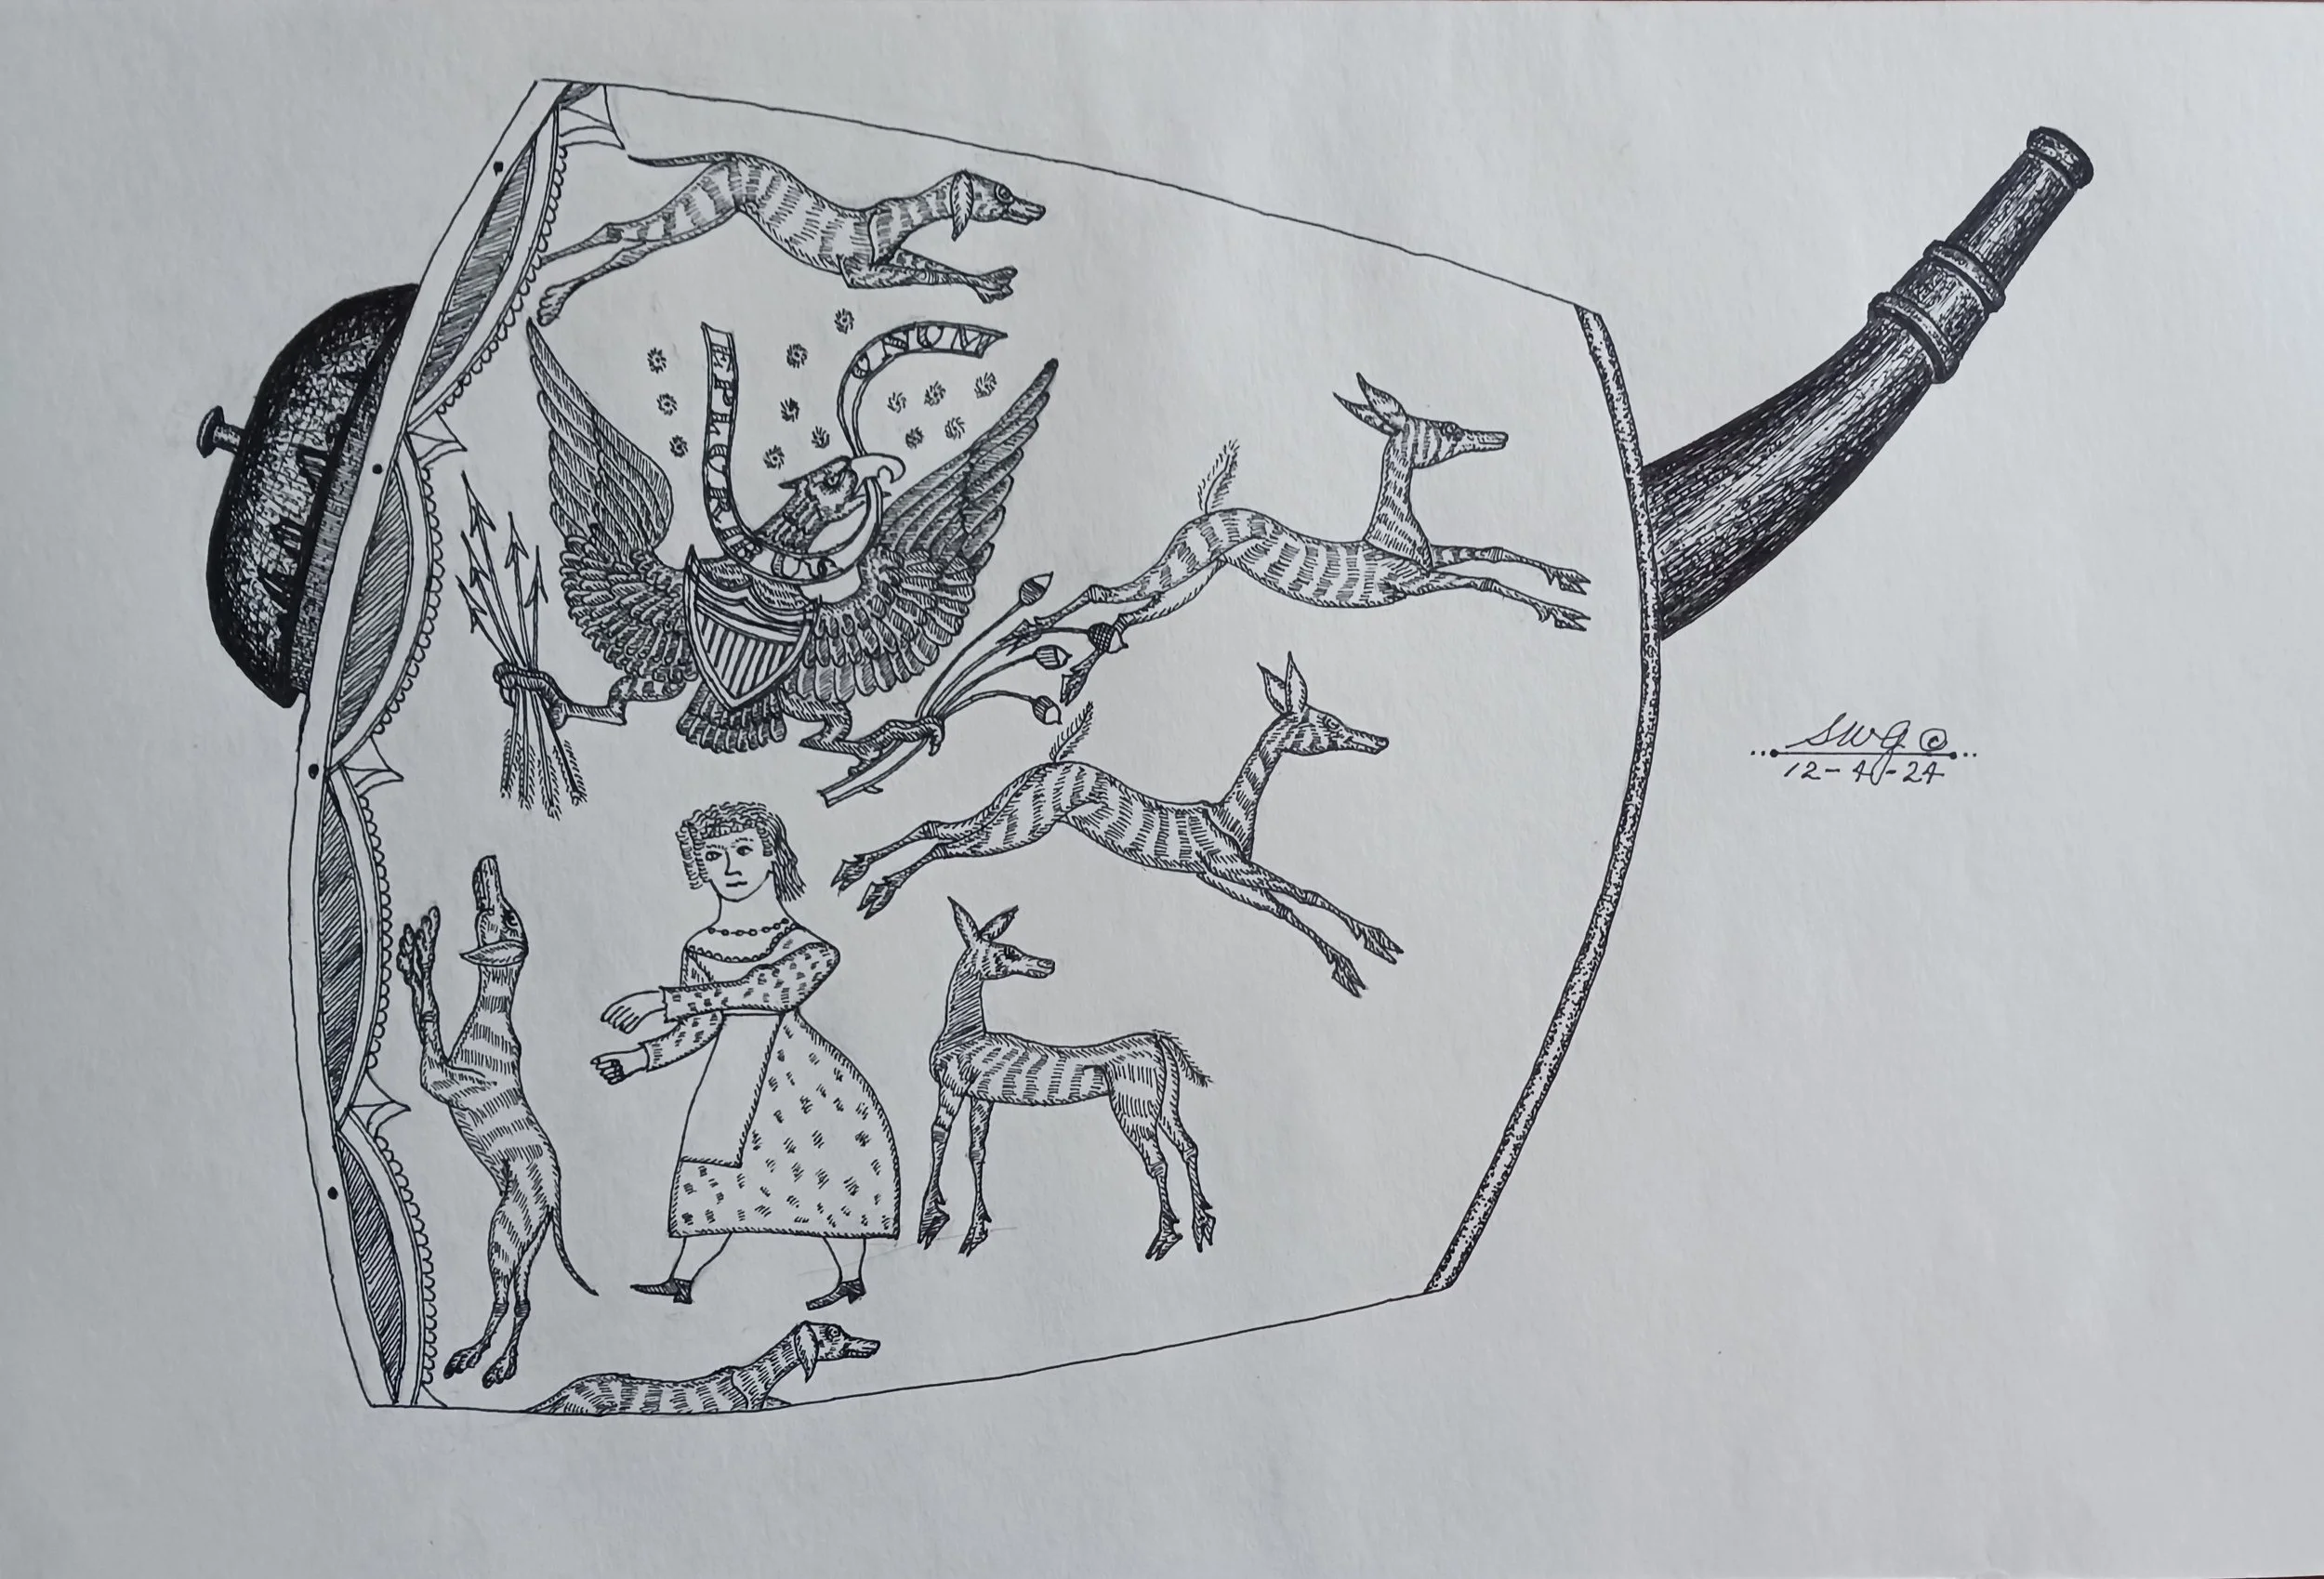
Sessions 7: This session completed the inking of all remaining dog and deer plus the narrow “wedding band” bead/ridge separating the horn body and throat. The horn body’s skin, or decorated surface, was now done.
Session 8: The last session inked the horn’s spout and plug. The ends of the horn require attention to how light reflects off their curved surfaces, so they will appear natural. This plug had several small wood chips missing around its base, requiring pre-sketching of the chips with awareness of how light changes/reflects in the darker chipped areas.
Final Detail: After the horn sketch was inked, its pencil lines were carefully removed with a soft erasure to eliminate all traces of the preliminary pencil work. The clean-up process was done gently so the paper surface was not smudged or damaged. When finished and all erasure “dirt” discarded, the inked drawing had only its last and most enjoyable step remaining. Each horn sketch is then signed and dated in the lower right area, signifying another original Tansel powder horn had its artwork captured for posterity. Note: The author also records the horn’s key dimensions including inside and outside curve lengths, horn diameter at base, polychromed areas, and other unique/significant details on back of each ink sketch.
Documented Horns: Documenting original Tansel horns today will prove valuable in the future. Many Tansel horn copies are being made, most of which are easily identified. But some copies by better craftsmen are being aged and antiqued, at times with added wear and damage patterns, making them harder to identify. Over time, with more handling, more dings, more dirt… and unfortunately the removal of the carvers’ identification… some new horns will become almost indistinguishable from original horns, making documented horns more desirable and valuable.

